
08:22
Aug 13, 2022
3
3
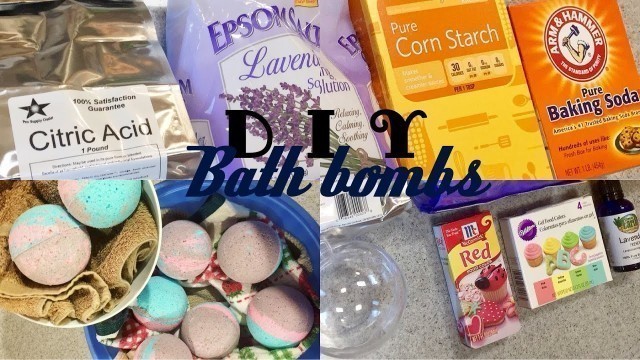
'A L O H A m/^_^m/ Hey guys! Yes Yes Y\'all I really wanted to show y\'all my DIY BATHBOMB MAKING! Down Below is a list of ingredients and instructions on how I created this Bomb Bathbomb! DRY INGREDIENTS: 1 CUP BAKING SODA 1 CUP CORN STARCH 1/2 CUP ESPON SALT (DOWN TO EARTH) 1/2 CUP CITRIC ACID WET INGREDIENTS: 1 TSP WATER 2 TSP ESSENTIAL OILS 3 TSP OLIVE / VEGETABLE OIL FOOD COLORING (ANY COLOR BY CHOICE) TOOLS: PLASTIC ORNAMENT BALLS (BEN FRANKLIN) BIG MIXING BOWLS WISP GLOVES SPOON CUP INSTRUCTIONS: First put all dry ingredients in one big bowl with exact measure & mix together evenly with no clumps. Than in a smaller cup you put all wet ingredients with the exact measure. Finally, add wet ingredients to dry ingredients slowly distributing small pours in between while mixing with the wisp or an even smoother texture which is better with your hands. Add more food coloring to get the color desire that you want. Please use gloves while doing the food coloring process... because it will stain your hands and also the table, use newspaper on the table before you start this DIY. While the texture is like a wet sand like form. You are ready to mold it in your plastic ornament. Add textured bath bombs in both molds and press firmly in each mold. It\'s important you press as you add more because this is how the bath bombs stay secure and tight. If you don\'t press firmly it will not come out solid like how a regular bath bomb looks like. Keep adding to both mold until you can\'t add anymore and put the 2 molds together and swipe away the rest of the bath bombs that are oozing out. Make sure it is locked in place and put the mold in the freezer so it gets hard. Keep in freezer for about 5 minutes and than when it\'s time to take it out use a hard spoon to tap on the top plastic mold to loosen it up so it doesn\'t stick to it. Than there u have it your cute bath bomb :) Store it in a bowl with soft towels to keep it secure where it gets hard or even better store in the refrigerator until it times for u to wrap it in cute cellophane. Or just go cheap and put it in a zip lock bag lol I Hope you enjoy this video and PLEASE don\'t forget to SUBSCRIBE before you leave & if you like my work! Also give it a THUMPS UP & share my videos to whoever you want. Feel free to comment down below on anything you want me do a video on... THANKS a BUNCH xxoo FOLLOW me on Social Media: **Instagram: http://Instagram.com/shereezyxo FYI: “Makeup & Hairdressing is art. Every face is a blank canvas and every brushstroke creates something magical. Cosmetics enhance natural beauty but also build confidence for everyday life. When you feel good, you look good, and makeup helps you to achieve this positive feeling. Cutting, styling, and creating hairstyles is a process learned overtime. It\'s the passion you create from a vision that can appears true to it\'s skill. So please; NO HATERS!'See also:









comments